The Going-Out Coat: How to Draw Fashion's Breakout Trend
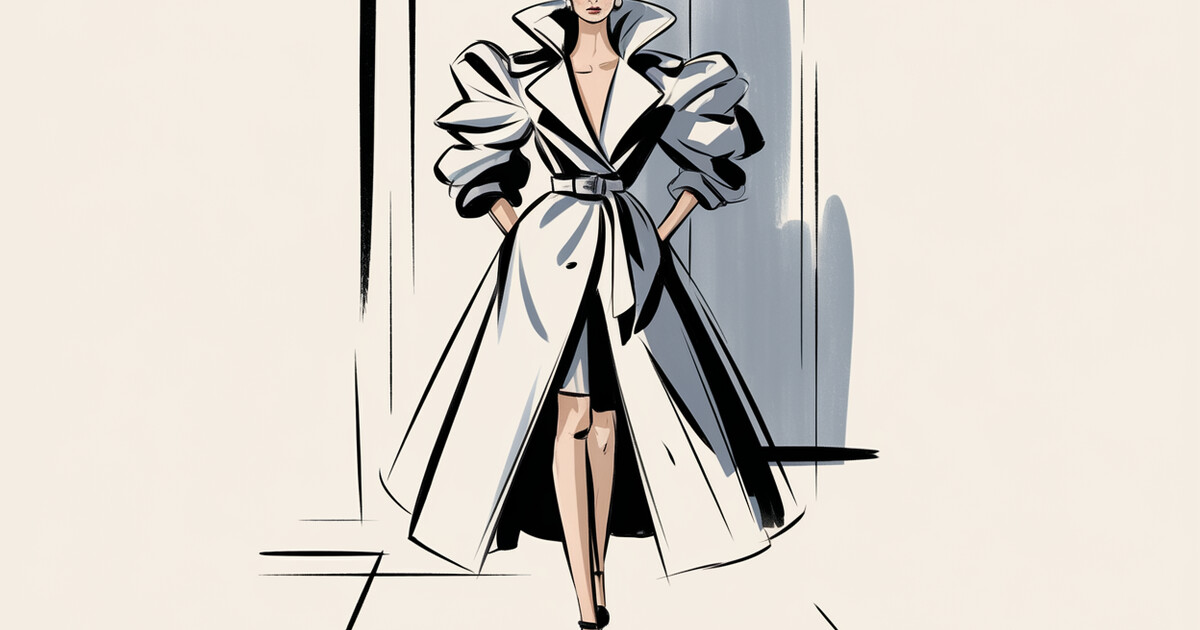
The coat is no longer something you take off at the door. This season, it is the outfit. The "going-out coat" has emerged as one of fashion's most exciting trends, and for illustrators, it's a goldmine of dramatic silhouettes and bold structure. Here's exactly how to draw it.
What Makes a Going-Out Coat?
Before you pick up your pencil, understand what separates a going-out coat from regular outerwear. This is not a parka. It's not a puffer. A going-out coat is designed to be seen, not just worn. Think:
- Exaggerated shoulders. Broader, more structured, sometimes padded. The shoulder line is a statement.
- Cinched or belted waists. These coats define the body underneath. They're fitted, not boxy.
- Dramatic length. Midi to floor-length, always with intention. The hemline is part of the design.
- Luxe fabrics. Heavy wool, cashmere, velvet, or even satin. Nothing that reads "commuter."
- Minimal layering beneath. The coat does the heavy lifting. What's underneath almost doesn't matter.
Runways from London to Milan have been full of coats that function as eveningwear. For illustrators, this is thrilling because the silhouette is everything, and silhouette is what we do best.
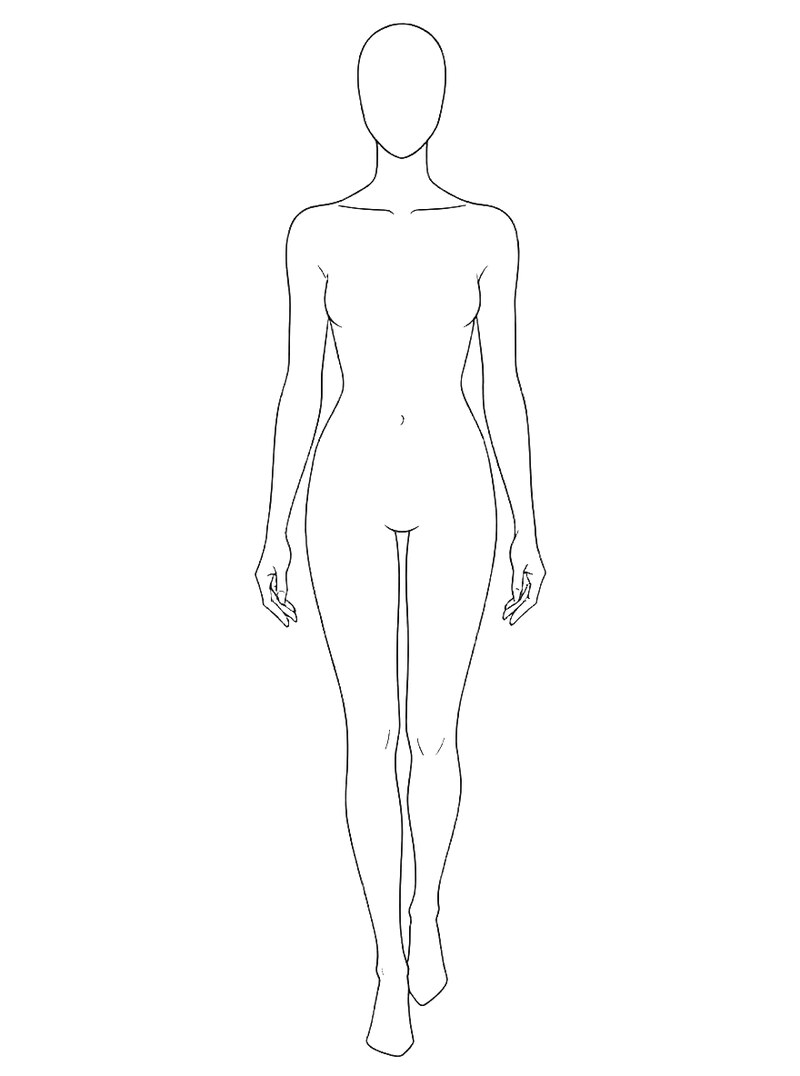
Step 1: Start with the Light Pencil Croquis
The number one mistake when drawing structured outerwear? Starting with buttons, pockets, and collar details before nailing the overall shape. With a going-out coat, the contour line carries 80% of the impact.
Try this exercise:
- Draw your croquis figure lightly in pencil. (If you need a refresher on proportions, check out our 9-head proportion guide.)
- Before adding any coat details, draw only the outer silhouette of the coat with a thick marker or felt-tip pen. One continuous line from shoulder to hem on each side.
- Step back. Does the shape alone read as dramatic? If you removed every detail, would the silhouette still say "statement piece"? If not, adjust the proportions before moving on.
Key proportions to exaggerate: Make the shoulders 1/4 to 1/2 head-width wider than your standard figure. Bring the waist in tighter than you normally would. Let the skirt of the coat flare or fall straight depending on the style, but give it length.
Step 2: Add Structure and Construction Details
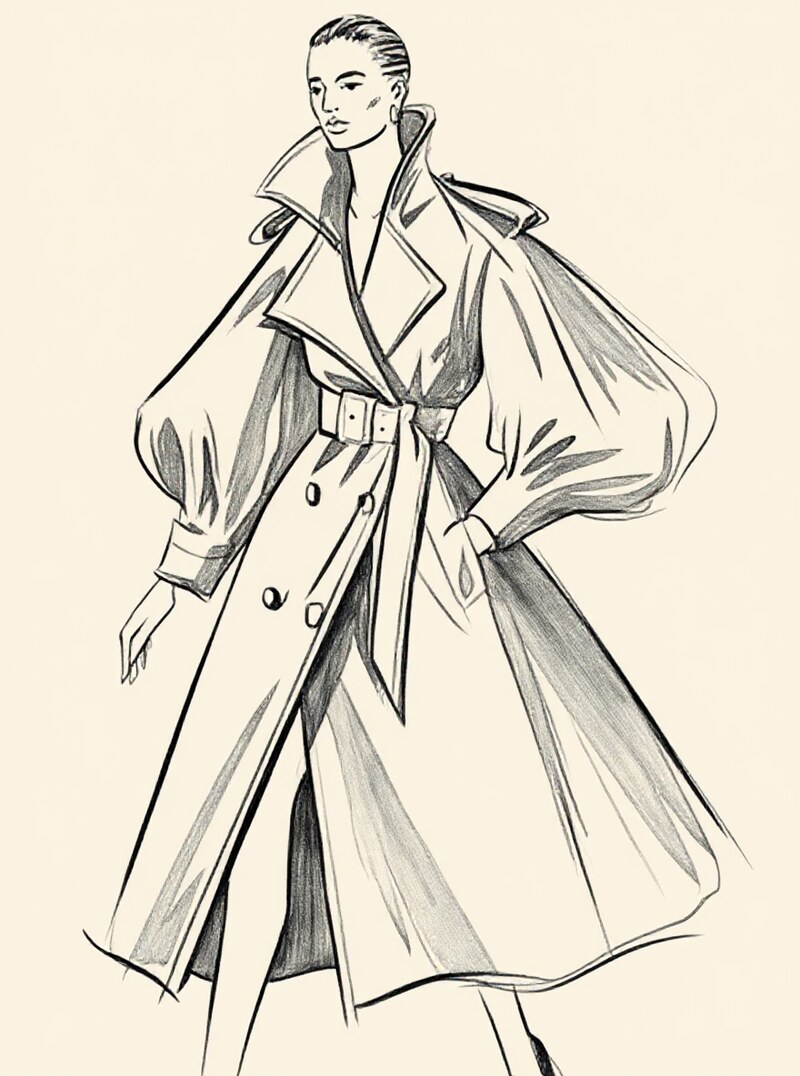
The shoulder is where a going-out coat announces itself. Unlike a draped cardigan or relaxed blazer, these shoulders have architecture.
How to render structured shoulders:
- Use straight, decisive lines. No soft curves at the shoulder point. The line from neck to shoulder tip should be nearly horizontal, or even slightly upward.
- Add a slight "shelf" shadow. Structured shoulders create a horizontal shadow line where the pad meets the sleeve. Draw a thin shadow just below the shoulder seam to sell the structure.
- The sleeve cap matters. Below the structured shoulder, the fabric of the sleeve will puff slightly before tapering. Capture this with a gentle outward curve just below the shoulder line.
- Line weight trick: Use your heaviest line weight on the shoulder line itself. This is the widest point of the garment and should command visual attention.
Best tools: A Sakura Pigma Micron 08 for the shoulder contour, stepping down to a 03 or 005 for interior construction lines.
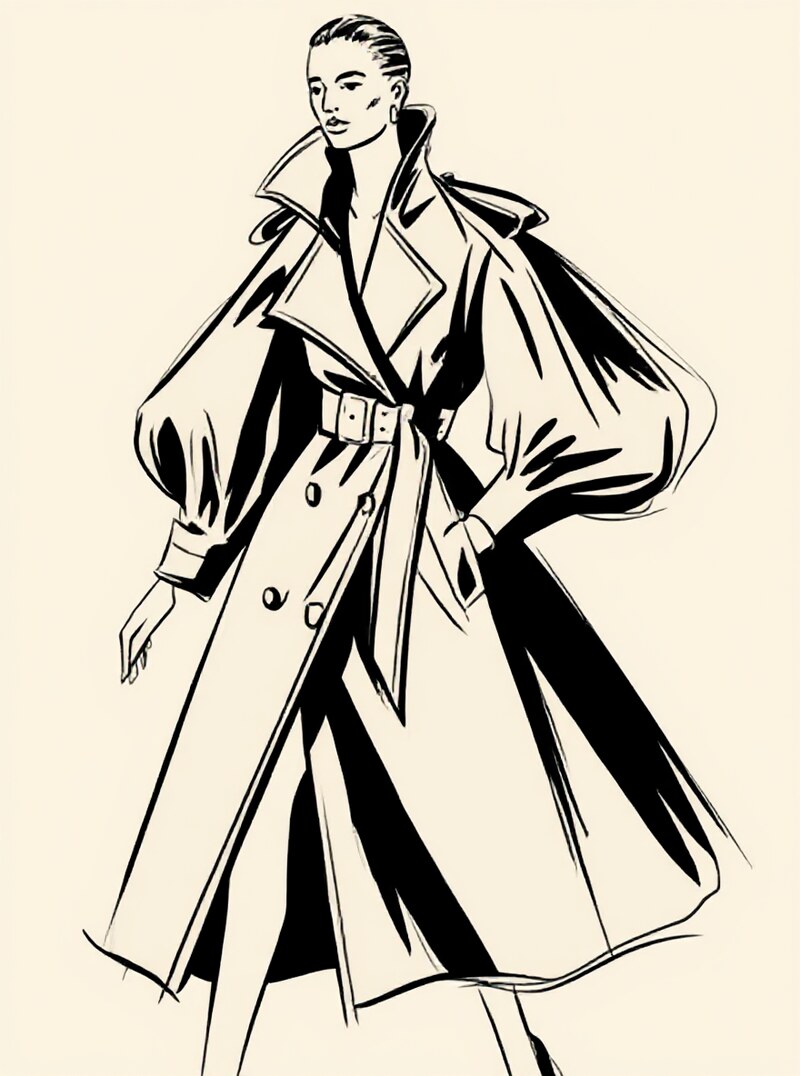
Step 3: Block in Shadows and Ink
The Cinched Waist and Lapel Drama
Going-out coats almost always have a defined waistline, whether through a belt, a seam, or strategic darting. This creates the hourglass that makes the coat read as eveningwear rather than outerwear.
Drawing the waist:
- Indicate the belt or waist seam with confidence. Don't draw it as a thin, timid line. A belted coat deserves a belt drawn with weight: two parallel lines with a buckle or knot detail.
- Show the fabric pulling. Above and below the waist cinch, fabric gathers slightly. Add small radiating fold lines from the belt/seam to show tension.
- The lapel sets the tone. Wide, peaked lapels say power. A shawl collar says evening elegance. Notch lapels say classic. Choose your lapel shape first, then draw it with the same decisiveness as the shoulders.
Lapel rendering tips:
- Draw the lapel as a separate plane from the coat body. It should have its own shadow, its own fold.
- The inner edge of the lapel (where it folds back) catches a shadow. Add a medium-value tone here to make it pop.
- Peaked lapels point upward and outward. Exaggerate the angle slightly for fashion illustration; subtlety reads as error at small scale.
Step 4: Rendering Heavy Fabric
Going-out coats are made from fabrics with weight. Wool, cashmere, and heavy crepe do not behave like cotton or silk. Your rendering needs to reflect that.
How heavy fabric folds differently:
- Fewer, larger folds. Heavy fabric doesn't crinkle. It creates broad, sweeping fold shapes. Where silk might have ten small wrinkles, wool has two or three major folds.
- Rounded shadow shapes. The shadows in heavy wool are soft-edged and tubular, not sharp and angular like denim. Think gentle curves, not zigzags.
- The fabric holds the silhouette. Unlike lightweight materials that cling to the body, heavy coat fabric maintains its own shape. Draw the coat's form as somewhat independent from the figure beneath.
- Subtle texture. You can imply wool with very light, short, directional strokes layered over your shadow areas. Don't cover the whole surface; just hint at texture in the mid-tone zones.
Pencil approach: Use Staedtler Mars Lumograph pencils in the 2B-4B range. Build up shadow gradually with smooth, overlapping strokes. Blend sparingly with a tortillon for the softest shadow areas, but leave the edges of shadows slightly unblended for that structured feeling.
Marker approach: Lay your base tone with a Copic marker in a warm or cool gray (depending on the coat color). Add a second, darker layer in the fold areas while the first layer is still slightly wet for seamless blending. Use a colorless blender to push highlights.
Step 5: The Hem and Movement
A going-out coat's hemline is where drama meets the ground. Whether it's a sweeping floor-length cut or a sharp midi stop, the hem tells the story of how this coat moves.
- Walking pose = asymmetric hem. If your figure is mid-stride, the coat will swing. One side of the hem will be higher, the other lower. Add a slight curve or flare to show motion.
- Standing pose = weighted hem. A still figure in a heavy coat creates a clean, slightly curved hemline. The weight of the fabric pulls it down evenly. Draw it with a single, confident line.
- Show what's underneath (barely). One of the hallmarks of the going-out coat is the peek of a leg, a heel, or a slim trouser below the hem. Don't draw a full outfit underneath. A glimpse of a pointed-toe heel below the coat hem is all you need.
Step 6: Bringing It All Together
Here's a complete workflow for a going-out coat illustration:
- Light pencil croquis. 9-head figure, walking or three-quarter pose.
- Silhouette contour. Heavy line, shoulders to hem. Get the shape right first.
- Structure lines. Shoulder seams, waist belt/seam, lapels, sleeve breaks. Medium line weight.
- Fold map. Mark your three or four major fold locations. Remember: fewer and larger for heavy fabric.
- Shadow rendering. Build up tonal values in the fold areas and under structural elements (lapels, belt).
- Details last. Buttons, stitching, belt buckle, pocket flaps. Use your finest pen.
- Erase the pencil croquis where the coat covers the body. The figure beneath should nearly disappear.
Common Mistakes to Avoid
- Drawing the coat too close to the body. A structured coat has its own form. Leave space between the figure and the coat's outer edge, especially at the shoulders and hips.
- Too many fold lines. Heavy outerwear = minimal folds. If your coat looks wrinkled, you've added too many. Strip it back.
- Flat lapels. If your lapels don't have their own shadow, they'll look like they're printed on the coat rather than folded over. Always give the lapel fold a shadow.
- Ignoring the weight. A going-out coat should look like it has substance. If your coat could be mistaken for a cardigan, the line weight and shadow shapes aren't doing their job.
- Forgetting the underneath. Even though the coat dominates, showing a sliver of what's below, a heel, a trouser cuff, a hemline of a dress, grounds the illustration.
Practice Exercise: Three Coats, Three Silhouettes
Grab your sketchbook and draw the same croquis figure three times. On each one, design a different going-out coat:
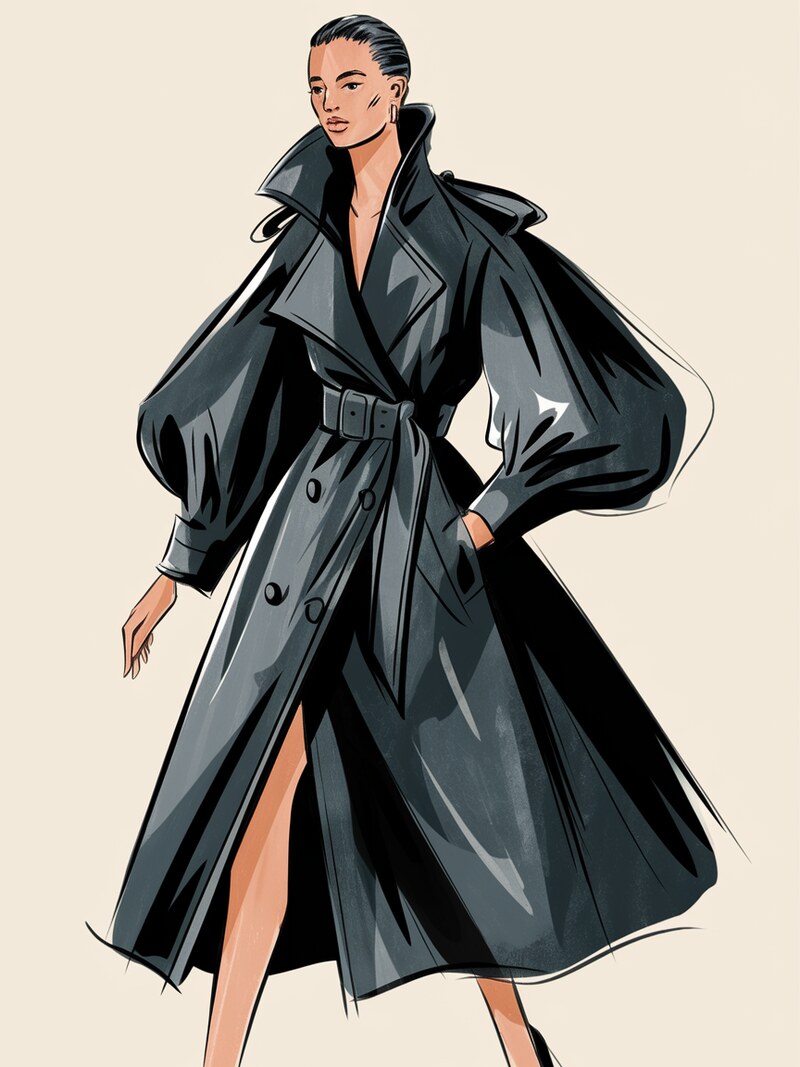
- The Power Coat. Ultra-wide shoulders, double-breasted, peaked lapels, midi length. Think: boardroom meets black-tie.
- The Evening Wrap. Shawl collar, belted, floor-length, in a draped fabric like velvet or heavy crepe. Think: old Hollywood glamour.
- The Statement Trench. Oversized proportions, dramatic collar, bold color. Cinched waist with an oversized belt. Think: street style meets runway.
Compare the three. Notice how much the silhouette alone changes the mood, even before you add any rendering or detail.
Supplies for Drawing Structured Outerwear
For Line Work
Sakura Pigma Micron Set (6 pens) provides the range of line weights you need: 08 for contours, 005 for stitching details. The archival ink won't bleed with markers.
For Pencil Rendering
Staedtler Mars Lumograph (12 pencils) gives you the full range from hard construction lines (2H) to rich shadow tones (6B). The core holds a sharp point for clean details.
For Marker Work
Copic Sketch 72-Color Set is the industry standard for fashion illustration. The cool and warm gray range is essential for outerwear rendering.
For Sketching
Strathmore 400 Series Sketch Pad handles both pencil and light marker work. The tooth grabs graphite well for building up fabric texture.
Want to Practice on Professional Templates?
Our Fashion Croquis Template Sketchbook: Paris Edition gives you ready-made 9-head figures with scenic Paris backgrounds, perfect for sketching outerwear designs without starting from scratch.
Get the Paris EditionShop the Trend
Want to study the real thing? Here are some going-out coats worth examining up close for silhouette, construction, and fabric drape:
- Notched Collar Double Breasted Wool Blend Coat - Classic structure, great for studying lapel construction
- Double Breasted Notch Lapel Trench Coat - The statement trench silhouette in real life
- Double Breasted Midi Peacoat - Midi length, structured shoulders, belted waist. A textbook going-out coat
Some links above are affiliate links. If you purchase through them, we may earn a small commission at no extra cost to you. We only recommend products we genuinely use or believe in.